How To Take Screenshot In Windows 10
As a software tester for PCMag, I have to take a lot of screenshots every day. Screenshots are the best way to show people how a program looks when it is truly being used. I review Windows apps most of the time, so I know how to take screenshots on that operating system. Almost every computer user needs to take a picture at some point, even if it’s just to show what’s on the screen to someone else
It’s crazy how long it’s taken to get this simple skill down pat. Windows has been able to print the screen since the first PCs came out in the 1980s, though their text-based choice was different from the raster pictures that are used today. With Windows 10, you could take screenshots in new ways, like with the Snip & Sketch tool. With Windows 11, the Snipping Tool makes it even easier to take pictures.
Take Screenshot In Windows 10
We will talk about pictures in Windows 10 here. Here, I’ll show you how to take a picture of your Windows 10 PC screen in a few different ways, so you can choose the one that works best for you.
1. Press Shift-Windows Key-S and Snip & Sketch.

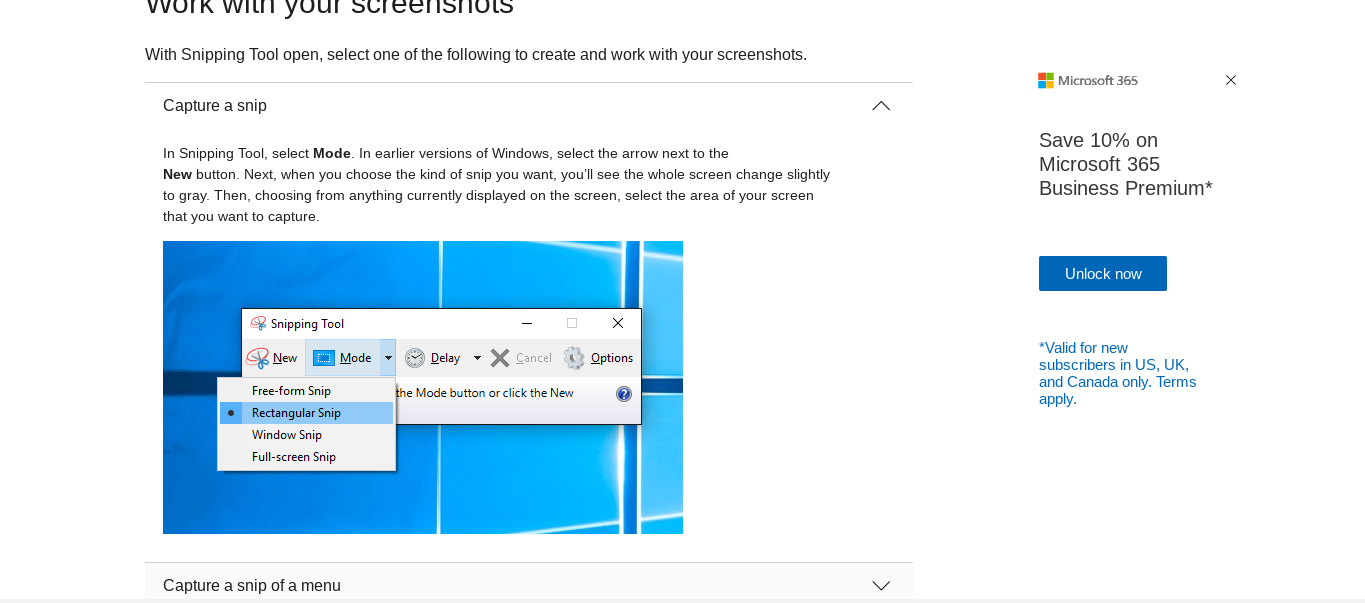
After using Snagit (see below) for many years, this is now the way I take most of my screenshots: When you press Shift + Windows Key + S on your computer, you can take a picture of the whole screen, a rectangle, a freehand shape, or a program window. The Screen Snip button in the Action Center is another way to open Snip & Sketch.
When you use this keyboard action, a small image panel appears in the lower right corner for a moment and says “Snip Saved to Clipboard.” If you tap this, the Snip & Sketch app will open. In this, you can crop the picture and make notes on it with a pen, pencil, marker, eraser, or ruler. Then you can save the picture to a place of your choice or share it using the Windows Share menu. This lets you send it to Instagram, Messenger, Mail, or any other app that supports the file type. You can also send it to a PC that has Close Sharing turned on.
Text overlay and basic forms, like the always-useful arrow, are two things I wish Snip & Sketch had. If you only want to use this tool, you can go to the Settings app in Windows and choose Ease of Access > Keyboard, and then Use the PrtSc Button to Open Screen Snipping. Windows must be restarted for this to work.
2. Use the Print Screen key with the clipboard
This has been the standard way to take a picture in Windows 10 for a long time. It’s especially helpful for apps that change how they look when you press a certain key combination. When you tap the shift key, a window will often close. When you press the Print Screen or PrtSc key, the whole screen is copied to the Clipboard. If you press Alt along with Print Screen, only the current window square is copied. You do need to take extra steps to open and save your picture in a program like Paint, Paint 3D, or even Photoshop (unless you use the next tip). When you’re in a new document in one of these apps, just press Ctrl-V to paste the picture. You can then change it as much as you want and save it in the folder of your choice.
3. With OneDrive, use the Print Screen key
This is one of the best things to ever show up in Windows photos. It came out in 2015. With the Print Screen and Alt-Print Screen keys, you can save the whole screen or just the current window, just like with the Print Screen key. But if you go to OneDrive’s Settings panel and choose Automatically Save Screenshots and Captures to OneDrive from the Backup tab, you won’t have to open a picture app, paste the file from the clipboard, and then save the file. When you press “Print Screen,” a picture file is saved in one step.
4. Use the shortcut. Windows-Print Screen
This method was first used in Windows 8, but it still works in Windows 10. Some of the other ways in this story are more complicated than this one. You can do this on laptops like the Surface Pro by hitting the Volume Down and Power buttons at the same time. This or the Windows Key + Print Screen key combination will darken the screen for a moment to show you that it worked and save a PNG file to your Pictures > Screenshots folder right away.
When you press Alt+Windows+Print Screen, you only save the current window. Interestingly, this uses the Windows Game Bar (see next slide) to save your picture in the Videos/Captures folder. Both of these ways are good if you want to save something right away without having to use the Clipboard or OneDrive.
5. Use the Game Bar on Windows
When you press Windows Key + G, the Game Bar comes up, which has an icon that looks like a camera. If you tap this, the “Capture” area, which has a camera picture, will open. Tap that, and your picture will be saved in the Videos/Captures folder under your main user folder.
Conclusion
All versions of Windows are supported by the procedures described on this page. The primary methods and key combinations for taking a screenshot in Windows 10 are identical to those in Windows 7 or Windows 8, but there are some differences with the features of image editing tools and their location on the desktop, and these largely vary depending on the version of Windows used. We trust that your questions regarding taking a screenshot in Windows have been answered by this article. Users curious about the fascinating world of screenshots may find this article a valuable resource.