Repair Your iPad Charge Port and Restore Its Power
- 1 Reasons for Needing iPad Charge Port Repair
- 2 Steps Involved in the Repair Process
- 2.1 Diagnosis of Cause of Damage to Charge Port
- 2.2 Preparation, including Gathering Necessary Tools and Replacement Parts
- 2.3 Repairing the Charge Port
- 2.4 Quality Assurance Check
- 3 Common Problems Encountered During iPad Charge Port Repairs
- 3.1 Improperly Installed Parts or Components:
- 3.2 Damaged Parts Due To Improper Handling or Installation:
- 4 Conclusion:
Getting your iPad’s charging port repaired can be a complex process, but keeping your device running smoothly is necessary. This guide will provide an overview of why you may need an iPad charge port repair, the steps involved in the repair process, and some of the common issues that can arise during repairs.
Reasons for Needing iPad Charge Port Repair

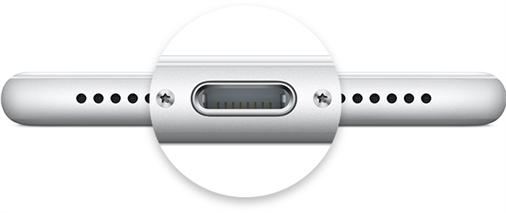
An iPad is great for staying connected and productive, but a damaged charge port can quickly damage its usefulness. You may need an iPad charge port repair for several reasons, including overuse of the port, damage due to liquid exposure or dropping the device, or malfunctioning components within the port itself.
One of the most common reasons for needing an iPad mini charging port repair is overuse of the port. As you repeatedly plug and unplug devices from the charging port, they are more likely to become damaged. Loose connections or physical damage to the port’s components can occur, leading to problems with charging your device. Having a professional look at your device can help determine what needs to be done for it to work properly again.
Another reason why you may need an iPad charge port repair is due to damage caused by liquid exposure or dropping the device. If any liquids have spilled on or near your charging port, there is a chance that some of those liquids could have gotten inside its components and damaged them in some way. Additionally, if you’ve dropped your device recently, there’s also a possibility that something inside its charging ports has been knocked out of place.
Steps Involved in the Repair Process
The repair process is a crucial part of maintaining your electronic device. Knowing how to diagnose and repair damages properly is essential for keeping your device in good working order, whether it is a phone, laptop, or tablet. Here are the steps involved in the iPad charge port repair process:
Diagnosis of Cause of Damage to Charge Port
The first step in repairing your device is to diagnose why it isn’t charging properly. This could be due to faulty wiring, physical damage from dropping or water exposure, or malfunctioning components within the charge port. You will need an appropriate multi-meter to measure voltage and current flow between the two points to diagnose this issue. Suppose you detect any irregularities with either voltage or current flow. In that case, you will need to troubleshoot further by checking each component within the charge port until you isolate and identify the problem area.
Preparation, including Gathering Necessary Tools and Replacement Parts
Once you have identified what caused damage to your charge port, it’s time to prepare for repairs by gathering all the necessary tools and replacement parts that may be required to fix your device. Depending on what type of damage has occurred, this could include screwdrivers, tweezers, replacement ports, and cables.
Repairing the Charge Port
The next step is repairing the charge port itself. This can be a complicated process, and it’s important to be careful and follow all instructions carefully to avoid causing further damage to your device. In general, you will need to replace the damaged components with new ones. This may involve soldering or other specialized techniques, so having the right tools and expertise for the job is important.
Quality Assurance Check
After all necessary repairs are complete, a quality assurance check should be performed to ensure the device works properly. This may involve testing the device’s charging capabilities, running diagnostics, or other tests to confirm everything is in order.
Common Problems Encountered During iPad Charge Port Repairs
While the repair process may seem straightforward, several common problems can arise during iPad charge port repairs. These include:
iPad charge port repairs are becoming increasingly common as the device’s popularity grows. However, these repairs can be difficult and time-consuming, resulting in various issues. To ensure your repair is successful, knowing the most common problems encountered during iPad charge port repairs is important.
Improperly Installed Parts or Components:
One of the most common issues encountered during an iPad charge port repair is improperly installed parts or components. This can occur when inexperienced technicians attempt to replace damaged ports without ensuring all parts are installed and connected properly. This can lead to further damage down the line, so it is important to ensure any technician you use has experience in this type of repair.
Damaged Parts Due To Improper Handling or Installation:
Another issue when attempting an iPad charge port repair is damaged parts due to improper handling or installation. For example, suppose components such as screws and connectors are not handled properly. In that case, they may become bent or broken, resulting in further damage if not addressed quickly and correctly by a qualified technician.
Conclusion:
Overall, iPad charge port repair is a relatively simple process that can be done by an experienced technician or even the average consumer. It requires some specialized tools and knowledge of electronics, but with the right guidance, it is possible to complete the repair safely. Repairing a charge port can save you money compared to replacing the device, so it’s always a good idea to consider this option before purchasing a new iPad.


