How to Remove USB Drive Write Protection on Windows 10/11
- 1 Part One: What is USB Write Protection?
- 2 Part Two: What Caused USB Write Protection?
- 3 Part Three: How do you remove USB Drive Write Protection on Windows 10/11?
- 3.1 Method 1: Use Physical Write Protection Switch
- 3.2 Method 2. Remove Write Protection from USB via Diskpart Command
- 3.3 Method 3: Remove Write Protection from USB Using Registry Editor
- 3.4 Method 4. Switch Off BitLocker to Unlock the Write Protected USB Drive
- 4 Part Four: How to Format Write Protected Using Write Protection Removal Tool
- 5 Part Five: How to Recover Data after Formatting USB Write Protected
- 6 FAQs:
- 7 Conclusion
How to remove write protection from a USB drive is one of the common queries searched on the web. Many struggle because they cannot add, modify, or delete data on their USB drives. The main reason behind this issue is that the USB is write-protected. Moreover, you cannot format a USB drive when writing is protected.
So, if you are also struggling with the same issue, you have landed on the right guide. Here, we will talk in detail about USB write protection and then list the best-proven ways to remove USB drive write protection on Windows 10/11. So, let’s get started!
Part One: What is USB Write Protection?
A USB write protection means you have limited control over your USB drive. You cannot add new data or modify/delete existing data in the drive.
The USB write protection feature is meant to avoid accidental deletion or overwriting of existing data in the drive. However, it can cause issues when you have to change data on the USB. For such scenarios, removing write protection from a USB drive becomes essential.
Part Two: What Caused USB Write Protection?
Many people apply USB write protection to protect the files in the USB drive. However, a USB drive can also unintentionally become write-protected due to different reasons, as follows:
- The USB physical switch is on the lockside.
- Virus attacks or third-party encryption software made the USB show a write-protected error.
- USB is accidentally set to read-only.
- The BitLocker protection partition is enabled on the USB volume.
- File system issues on the USB drive made it write-protected.
In short, there are many ways/reasons for USB drives to become write-protected. However, it is easily fixable using multiple ways. Head to the next part to learn how to remove USB drive write protection.
Part Three: How do you remove USB Drive Write Protection on Windows 10/11?
Removing USB drive write protection is a lot easier than you think. Today, multiple ways exist to remove write protection from a USB drive on Windows 10/11. Below, we have shortlisted five best-proven ways you can use to fix the issue right away:
Method 1: Use Physical Write Protection Switch
The first way to remove USB write protection is to check the physical write protection switch. Unplug your USB and see if there is a switch on your drive. If yes, ensure it is in the “unlock” position. However, if you don’t see the switch, head to the following method to remove write protection from a USB drive.
Method 2. Remove Write Protection from USB via Diskpart Command
Diskpart is a helpful command in Windows to manage disk partitions. You can use it to handle different disk attributes, including USB write protection removal. Follow the below steps to learn how to remove USB drive write protection with the Diskpart command:
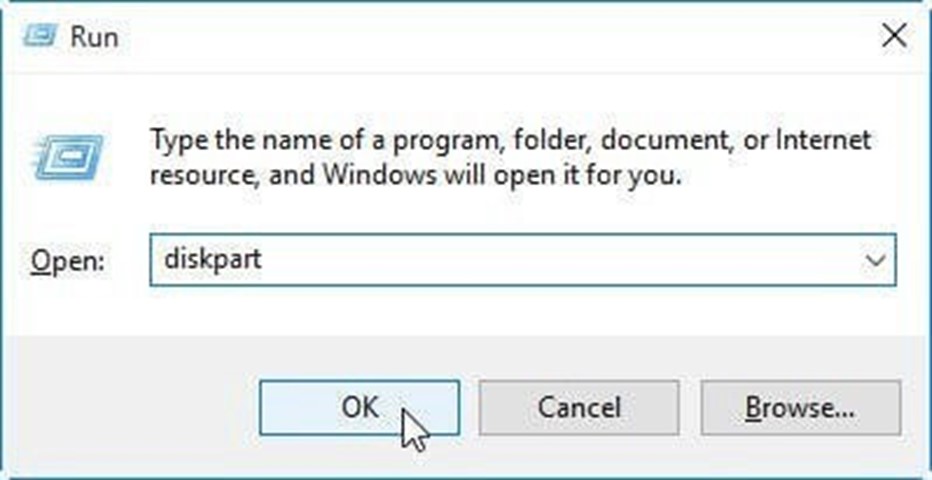
Step 1. Connect your USB drive to the PC. Click “Windows + R” to open the Run dialogue box. Type “diskpart” and tap Enter.
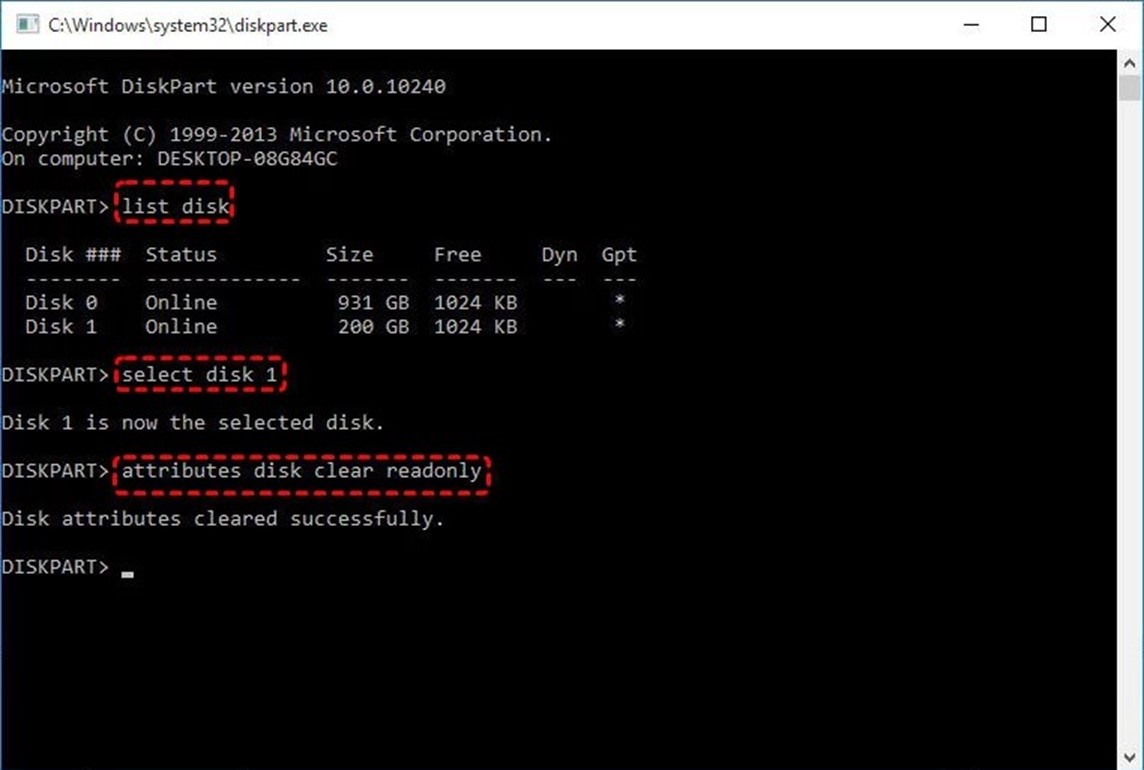
Step 2. Type the below commands one by one and hit Enter after every command:
- List disk – This command will show all computer disks. From there, note down the drive number of your USB.
- Select disk A – Replace A with the drive number of your USB.
- Disk characteristics evident read-only – This command will remove write protection from the USB drive.
Step 3. Type Exit and hit Enter to close the prompt.
This way, your USB write protection should be removed now. So, open the USB drive and see if you can modify the files.
Method 3: Remove Write Protection from USB Using Registry Editor
Registry Editor can also help to remove write protection from a USB drive. However, it is an advanced-level procedure, so make sure you follow the below steps correctly:
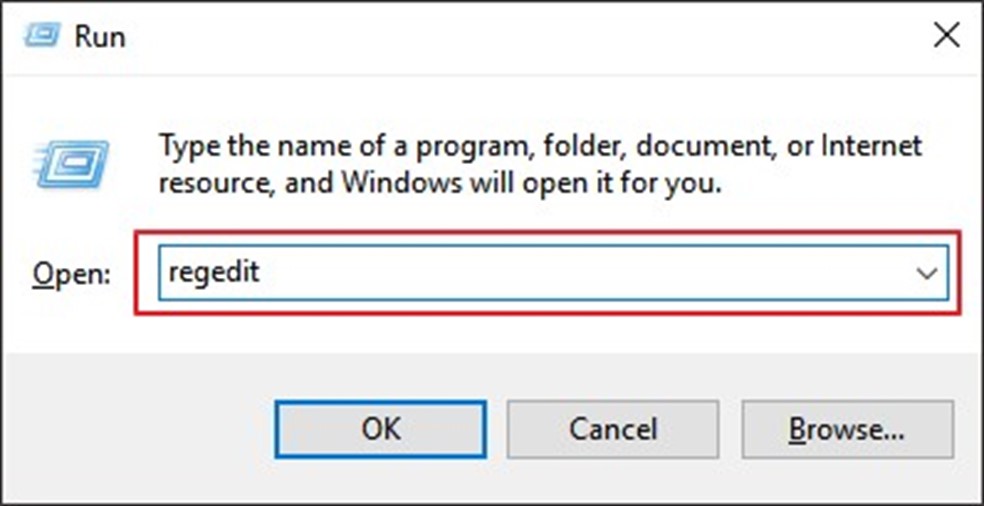
- Step 1. Connect your USB drive to the PC. Click “Windows + R” to open the Run dialogue box. Type “regedit” and tap Enter.
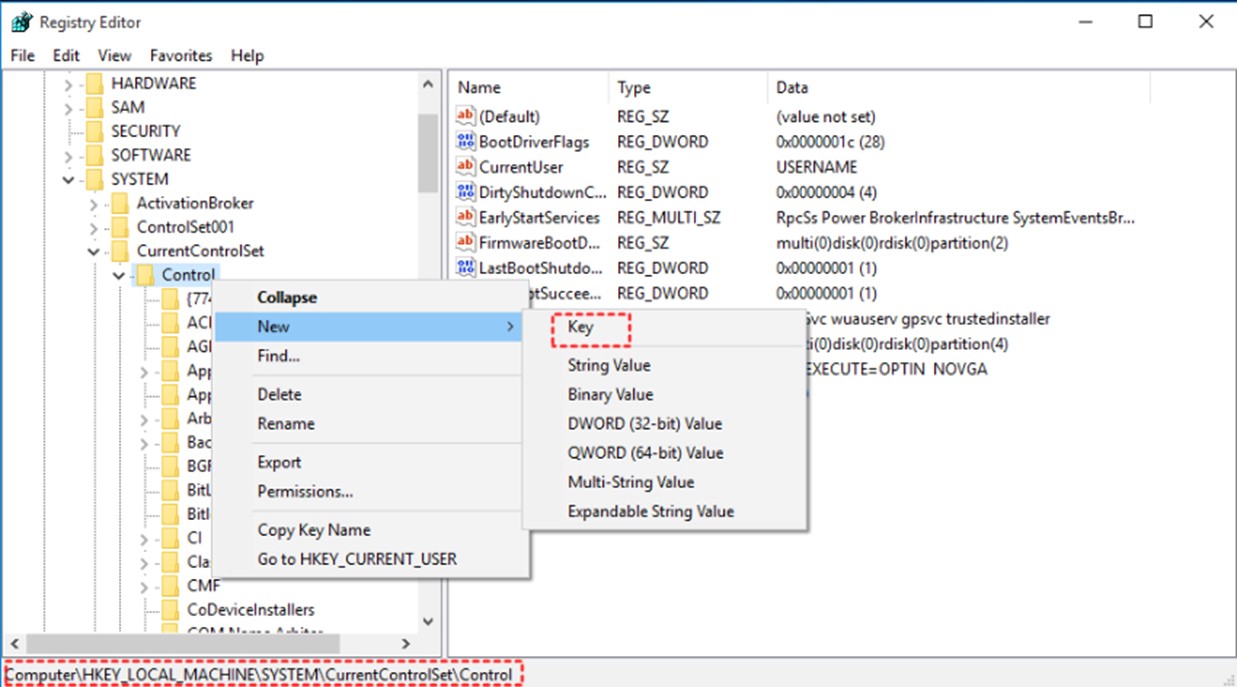
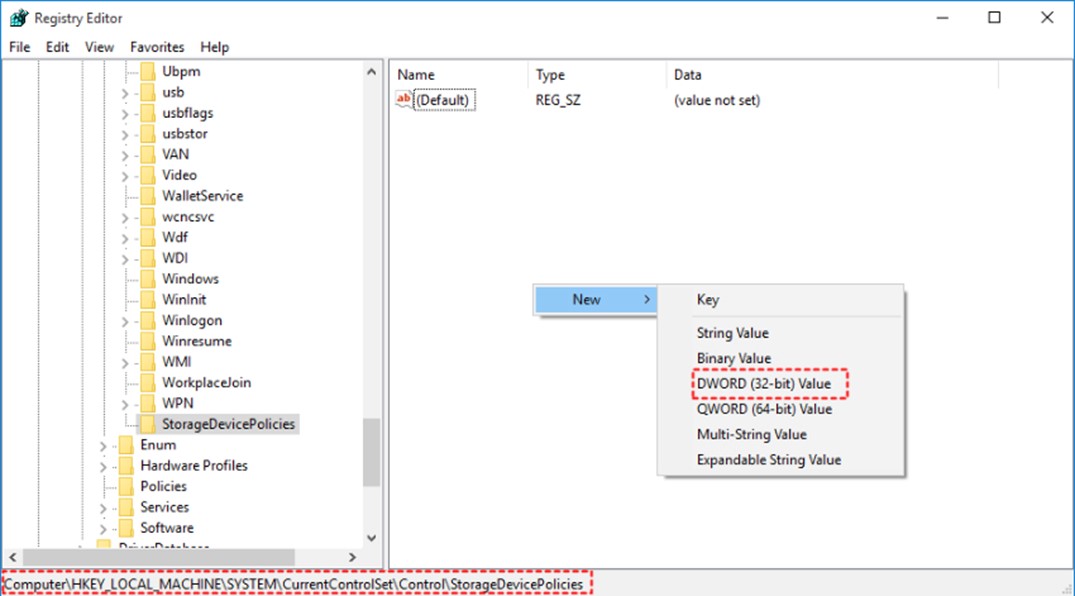
- Step 2. Go to the registry key: Computer\HKEY_LOCAL_MACHINE\SYSTEM\CurrentControlSet\Control.
- Step 3. Right-click the control folder and tap New > Key. Set up a new key named “StorageDevicePolicies”.
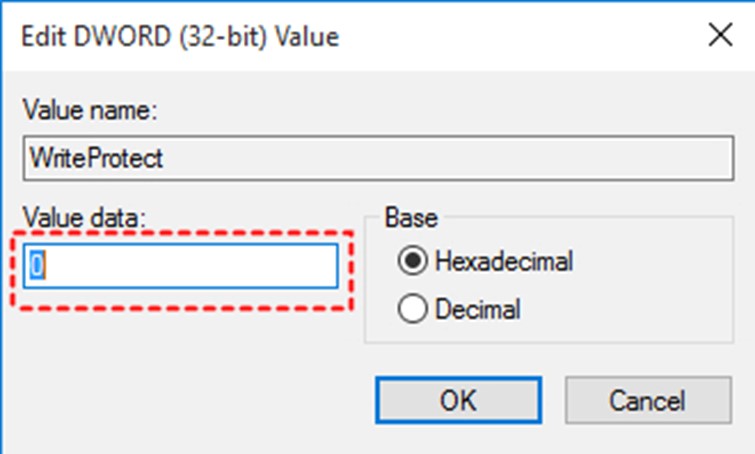
- Step 4. Right-click on the white space from the right-hand panel and click the StorageDevicePolicies key. Click New > DWORD (32-bit) Value. Afterwards, create a “WriteProtect” named DWORD.
- Step 5. Double-tap WriteProtect and set the value to 0.
- Step 6. Close Registry Editor and restart your PC.
Once your PC restarts, head to the USB drive and see if the write protection is removed.
Method 4. Switch Off BitLocker to Unlock the Write Protected USB Drive
An enabled BitLocker protects the files with its encryption. If BitLocker is allowed, you must remove the encryption to change a BitLocker partition. So, follow the below steps to learn how to remove USB drive write protection by switching off BitLocker:
- Step 1. Open This PC, right-click the USB drive, and tap “Manage BitLocker”.
- Step 2. Select the locked drive and press “Turn off BitLocker”.
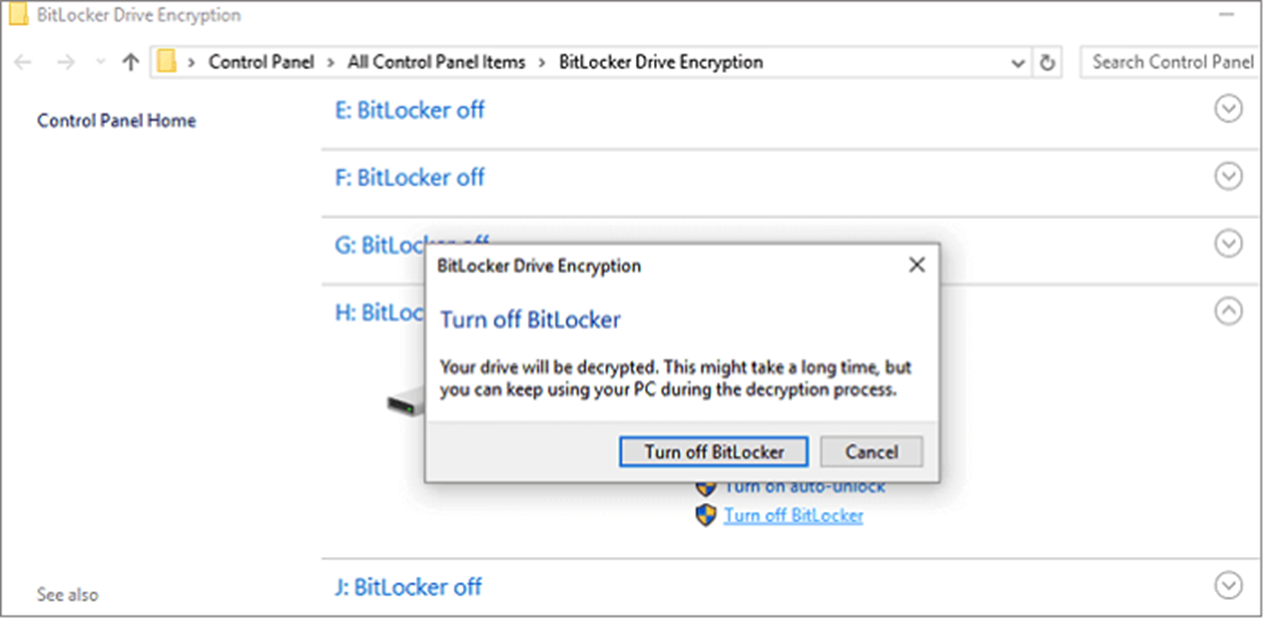
- Once the BitLocker is removed, you can start modifying USB drive data.
Part Four: How to Format Write Protected Using Write Protection Removal Tool
If you are unlucky in removing write protection from the USB drive after following the above methods, use a specialized write protection removal tool, like 4DDiG Partition Manager.
4DDiG Partition Manager is a feature-rich and intuitive tool that allows you to format a write-protected USB drive and fix the issue. Its click-based interface makes formatting USB write-protected an easy process. The best thing is that it allows you to format the USB drive to various file systems, like NTFS, FAT32, and exFAT.
Follow the below steps to learn how to format write protected USB with 4DDiG Partition Manager:
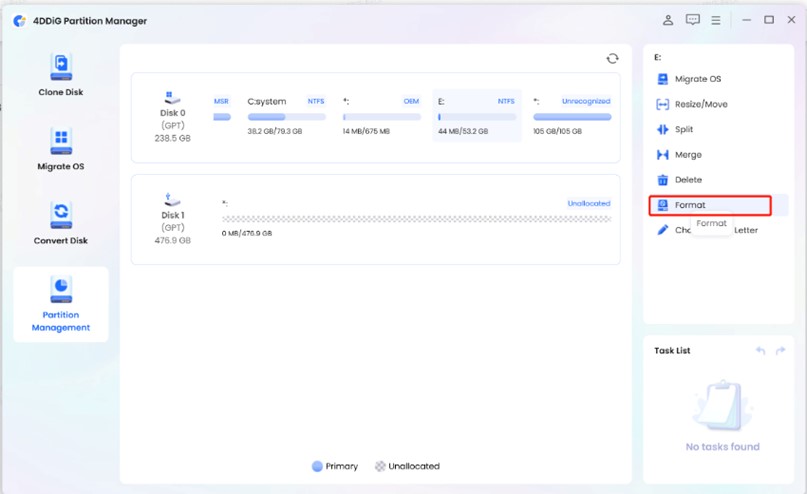
- Step 1. Download and launch 4DDiG Partition Manager on Windows 10/11. Plug the write-protected USB into your PC and tap “Partition Management”. Select your USB drive and click “Format”.
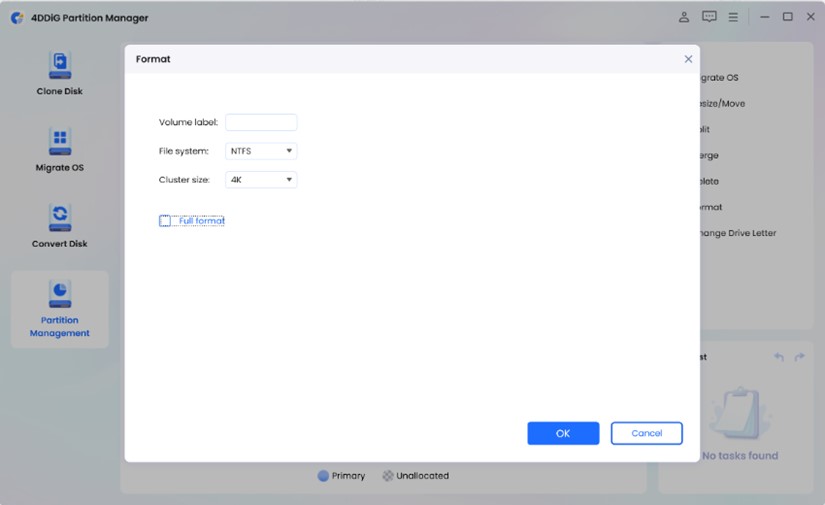
- Step 2. Set the volume label, file system, and cluster size. Once done, click “OK”.
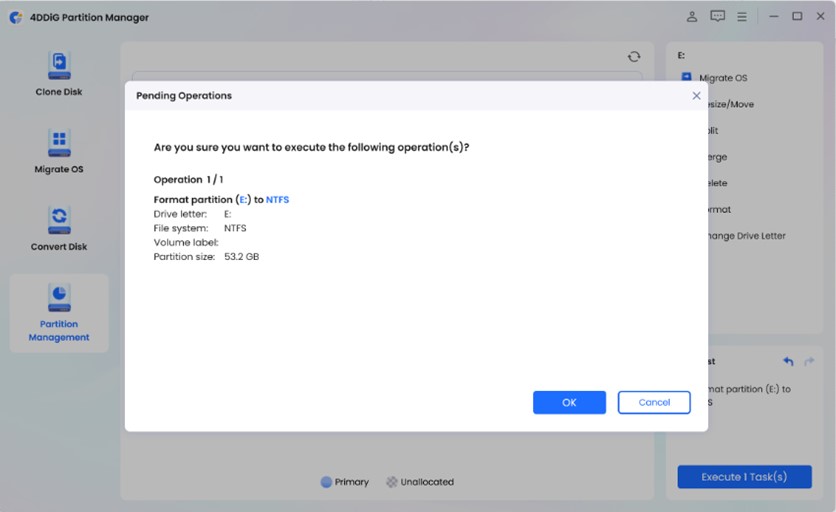
- Step 3. Verify the settings and click “OK” to initiate formatting.
Wait for the formatting to be completed. Once done, the USB write protection should be removed now.
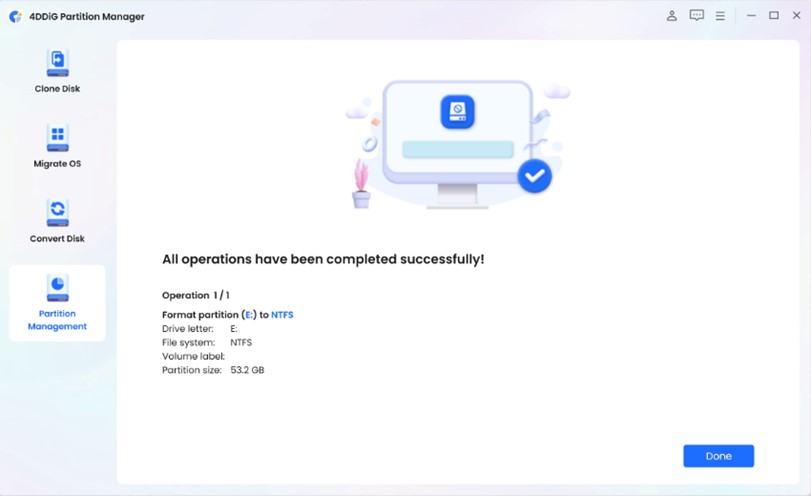
That’s it! This way, a few simple clicks with 4DDiG Partition Manager allow you to format a write-protected USB and fix the issue effortlessly.
Part Five: How to Recover Data after Formatting USB Write Protected
Once you have formatted the write-protected USB, all the existing data from the USB drive will be removed. However, if you haven’t backed up the data before formatting, then don’t panic. There are still strong chances you can recover all data even after formatting USB write protected. This is where the 4DDiG Data Recovery tool comes into play.
Tenorshare 4DDiG Data Recovery is a powerful, advanced data recovery tool that can intelligently scan and recover deleted/formatted data from your USB drive. The key features of 4DDiG Data Recovery are as follows:
- Recover lost/deleted data from various scenarios, such as formatting, deletion, corruption, etc.
- Recover 2000+ data types, including images, videos, audio, documents, etc.
- Recover data from USB drives, SD cards, hard drives, digital cameras, etc.
- Preview-based all or selective data recovery.
- Click-based interface to scan, preview, and recover data.
- Compatible with Windows 11/10/8/7 and Mac computers.
In short, 4DDiG Data Recovery is the ultimate tool to recover lost/deleted data regardless of the data loss scenario. Follow the below steps to learn how to recover data after formatting USB write-protected:
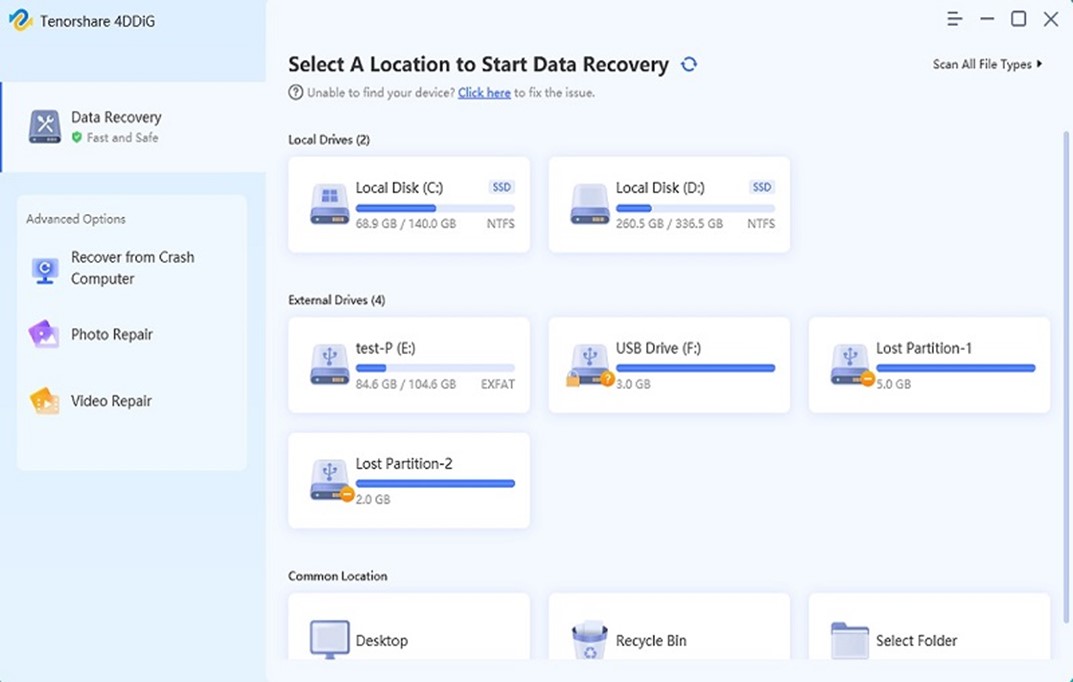
- Step 1. Download and launch 4DDiG Data Recovery. Connect and select the formatted USB drive and click “Scan”.
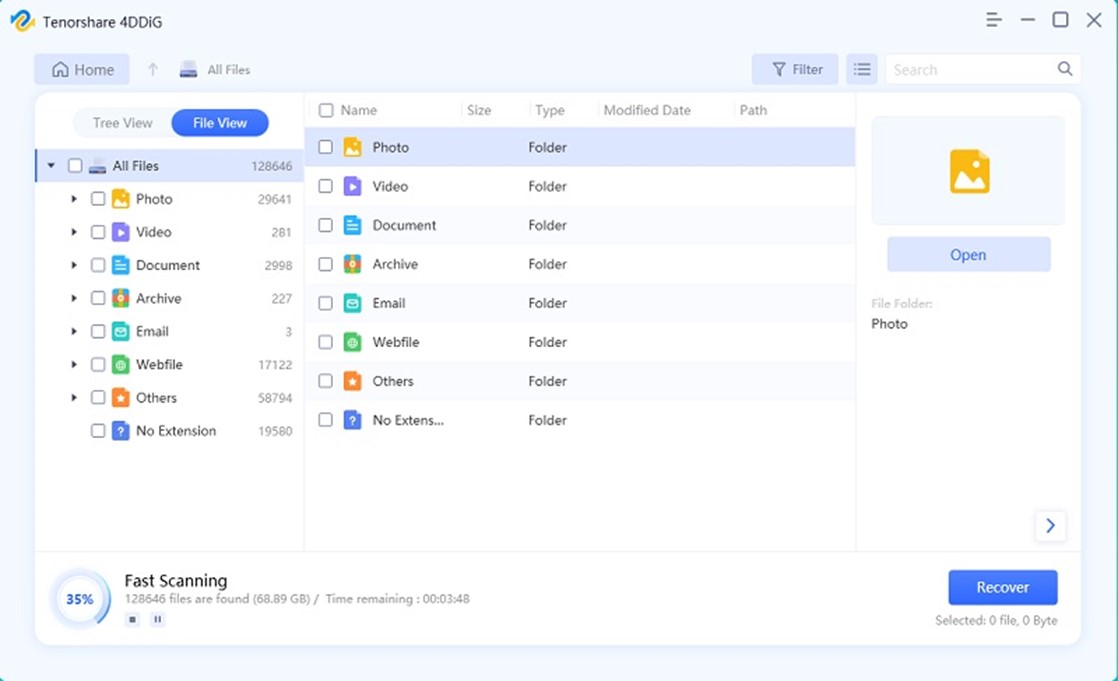
- Step 2. The tool will begin the deep scan of the drive to extract all the deleted files. You can even switch between File View and Tree View to view lost data.
- Step 3. Once the scanning is completed, preview and select the data you want to recover and click the “Recover” button from the bottom right corner.

That’s it! This way, a 3-step process with 4DDiG Data Recovery will let you recover deleted data from a formatted USB drive.
FAQs:
Why can’t I format the USB drive?
A USB drive that is write-protected does not allow you to modify, add, or delete data. That’s why it prohibits you from formatting the drive. You must remove the write protection and format the USB drive to eradicate this. Alternatively, you can use a write protection removal tool like 4DDiG Partition Manager to format USB drives and remove write protection.
What is the best write protection removal tool?
4DDiG Partition Manager is one of the best write protection removal tools. It is an intuitive and powerful tool that can remove write protection from a USB drive, SD card, or other drives with a few simple clicks.
Conclusion
A USB write protection helps protect the existing data in the drive, but it can also lead to inconvenience. Therefore, this guide thoroughly discussed removing write protection from a USB drive. However, the 4DDiG Partition Manager is the best write protection removal tool to eradicate the issue quickly. It can instantly format and remove write protection without any complications. Afterwards, you can use 4DDiG Data Recovery to recover the lost data from the formatted USB quickly.