A Comprehensive Guide to Laravel Swagger Integration
- 1 API documentation can be useful in this situation. How?
- 2 Pre-Set-up and Requirement for Laravel Swager Integration
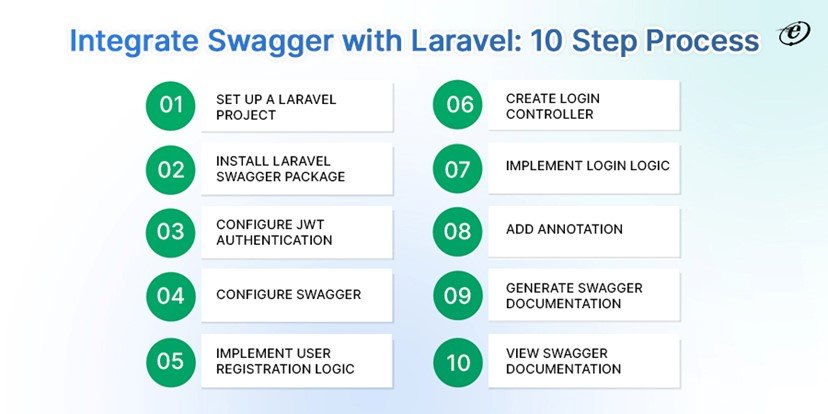
- 3 Laravel Swager Integration: Step-By-Step Guide
- 3.1 STEP 1: Set Up a Laravel Project
- 3.2 STEP 2: Install Laravel Swagger Package
- 3.3 STEP 3: Configure JWT Authentication
- 3.4 STEP 4: Configure Swagger
- 3.5 STEP 5: Implement User Registration Logic
- 3.6 STEP: 6 Create Login Controller
- 3.7 STEP: 7 Implement Login Logic
- 3.8 STEP: 8 Add Annotation
- 3.9 STEP: 9 Generate Swagger Documentation
- 3.10 STEP: 10 View Swagger Documentation
- 4 Conclusion
API documentation is vital since it guides developers on endpoints, parameters, data formats, and authentication, supporting efficient integration. In order to improve the capabilities of API documentation, this Laravel Swagger integration guide focuses on combining Swagger, an open-source framework, with Laravel, a well-known PHP framework.
Whether you are an experienced Laravel developer looking to improve your API development workflow or going to hire dedicated Laravel developers, this article provides a step-by-step tutorial for integrating Swagger into your Laravel 10 application.
In larger projects, there may be hundreds of API endpoints. As a result, unstructured verbal or written communication concerning the API services amongst technicians (through Slack, chat, email, etc.) quickly descends into chaos. It poses a severe problem for the team.
API documentation can be useful in this situation. How?
One of the most well-liked tools for API documentation is Swagger. It enables us to catalog the API endpoints and offers an interface through which users can interact with each API service by making requests and receiving responses.
Your API development process gains several perks with Laravel Swagger integration, including
- Developers can explore and test APIs directly from the documentation.
- Ensures consistent and up-to-date documentation with code changes.
- Simplifies collaboration between frontend and backend teams.
- Swagger validates request and response data, reducing errors.
- Provides a clear contract between API providers and consumers.
- Speeds up API development and testing, saving time and effort.
Let’s get started with a detailed and friendly lesson on Laravel Swagger Integration. Following these step-by-step instructions, you may use RESTful web services in your Laravel projects.
Pre-Set-up and Requirement for Laravel Swager Integration
Before integrating Swagger with Laravel for API documentation, you need to set up your development environment and meet certain requirements. Here’s a pre-setup and requirement checklist:
- Laravel Project: Ensure you have an existing Laravel project or create a new one if needed.
- Composer: Make sure you have Composer, a PHP package manager, installed. You’ll use it to manage Laravel dependencies and install Swagger tools.
- Laravel Version: Ensure your Laravel project uses a version compatible with Swagger (typically Laravel 5. x or later).
- Swagger Tool: Choose a Swagger tool or package for Laravel, such as Laravel Swagger or L5-Swagger. Install it via Composer in your Laravel project.
Laravel Swager Integration: Step-By-Step Guide
Integrating Laravel with Swagger for API documentation involves several steps. Here’s a step-by-step guide to help you achieve this:
STEP 1: Set Up a Laravel Project
Make sure you have a Laravel 10 project setup before integrating Swagger. Use Composer to create a new Laravel project.
composer create-project –prefer-dist laravel/laravel your-project-name
cd your-project-name
STEP 2: Install Laravel Swagger Package
Choose a Swagger package for Laravel. Run the command below to install `darkaonline/l5-swagger` package and the `tymon/jwt-auth` package using Composer.
composer require –dev darkaonline/l5-swagger
STEP 3: Configure JWT Authentication
Then install tymon/jwt-auth package using the composer command.
composer require tymon/jwt-auth
Run the following command to publish the Swagger configuration and assets:
php artisan vendor:publish –provider “L5Swagger\L5SwaggerServiceProvider”
This command will create a config/l5-swagger.php configuration file and a public/vendor/l5-swagger directory for assets.
STEP 4: Configure Swagger
In the config/l5-swagger.php file, you can customize the Swagger documentation settings, including the API title, version, and the location of the generated Swagger JSON file.
STEP 5: Implement User Registration Logic
Open/create the UserController and add the register method to handle user registration. Here is one example.
/**
* @OA\Post(
* path=”/api/register”,
* summary=”Register a new user”,
* @OA\Parameter(
* name=”name”,
* in=”query”,
* description=”User’s name”,
* required=true,
* @OA\Schema(type=”string”)
* ),* @OA\Parameter(
* name=”email”,
* in=”query”,
* description=”User’s email”,
* required=true,
* @OA\Schema(type=”string”)
* ),* @OA\Parameter(
* name=”password”,
* in=”query”,
* description=”User’s password”,
* required=true,
* @OA\Schema(type=”string”)
* ),
* @OA\Response(response=”201″, description=”User registered successfully”),
* @OA\Response(response=”422″, description=”Validation errors”)
* )
*/
public function register(Request $request)
{
$validatedData = $request->validate([
‘name’ => ‘required|string|max:255′,
’email’ => ‘required|string|email|unique:users|max:255’,
‘password’ => ‘required|string|min:8’,
]);$user = User::create([
‘name’ => $validatedData[‘name’],
’email’ => $validatedData[’email’],
‘password’ => Hash::make($validatedData[‘password’]),
]);return response()->json([‘message’ => ‘User registered successfully’], 201);
}
STEP: 6 Create Login Controller
With the following command, create a LoginController to handle the login logic.
php artisan make:controller LoginController
STEP: 7 Implement Login Logic
Now add the following code to LoginController
/**
* @OA\Post(
* path=”/api/login”,
* summary=”Authenticate user and generate JWT token”,
* @OA\Parameter(
* name=”email”,
* in=”query”,
* description=”User’s email”,
* required=true,
* @OA\Schema(type=”string”)
* ),
* @OA\Parameter(
* name=”password”,
* in=”query”,
* description=”User’s password”,
* required=true,
* @OA\Schema(type=”string”)
* ),
* @OA\Response(response=”200″, description=”Login successful”),
* @OA\Response(response=”401″, description=”Invalid credentials”)
* )
*/public function login(Request $request)
{
$credentials = $request->only(’email’, ‘password’);
if (Auth::attempt($credentials)) {
$token = Auth::user()->createToken(‘api_token’)->plainTextToken;
return response()->json([‘token’ => $token], 200);
}
return response()->json([‘error’ => ‘Invalid credentials’], 401);
}
STEP: 8 Add Annotation
You can use annotations in your controller methods to provide additional information about your API endpoints, such as parameter types and response formats. To do this, import the @SWG annotations and use them in your controllers. For example:
/**
* @SWG\Get(
* path=”/api/resource”,
* tags={“Resource”},
* summary=”Get a resource”,
* operationId=”getResource”,
* produces={“application/json”},
* @SWG\Response(
* response=200,
* description=”Successful operation”,
* @SWG\Schema(
* type=”string”
* )
* )
* )
*/
STEP: 9 Generate Swagger Documentation
Run the following command to generate the Swagger JSON file:
php artisan l5-swagger:generate
This command will create a Swagger JSON file based on your API routes and annotations.
STEP: 10 View Swagger Documentation
Visit the following URL in your web browser to access the Swagger documentation: http://your-app-url/api/documentation
The available GET/POST endpoints, along with the necessary parameters, can be seen by gaining access to the Swagger UI. The Swagger UI contains an “Authorize” input field or button. A modal window or input field will open by pressing this button, allowing you to enter the bearer token needed to access authorized APIs manually.
Visit the GitHub Repository for additional information.
Conclusion
Laravel Swagger Integration streamlines the process of API documentation by automatically generating clear, interactive, and up-to-date documentation. When you Hire Dedicated Developers this documentation improves communication and collaboration by providing a centralized reference point for developers.
Swagger also makes API testing and validation easier, lowering errors and improving API quality. Modern web application projects benefit significantly from Laravel Swagger integration because it increases productivity and speeds up development.
You can easily integrate Swagger into your Laravel projects by following the steps mentioned in this blog.
Author Bio: Avdhoot Vadghule is a fervent writer who aims to create valuable content that offers detailed insights to readers. He believes in utilizing various elements that make the content original, readable, and comprehensible. You can witness him indulging in sports, photography or enjoying a long drive on the city’s outskirts when not writing.